Video Editing for Beginners: How to Start Editing Videos in 2026
Every edit you have ever watched, from a film to a 20-second clip on your phone, is built from the same few moves: choose the good parts, put them in order, fix the sound, add words, export. The software looks intimidating because it shows you two hundred buttons at once. You need about ten of them. This guide teaches those ten, and lets you practise several in a free mini video editor that runs right on this page.
Video editing is selecting, trimming and arranging clips, then adding sound, text and colour adjustments to tell a clear story. To start, pick one free editor, import your footage, cut out everything that is not needed, put the clips in order, balance the audio, add simple titles or captions and export as an MP4 in the shape your platform uses: 16:9 for YouTube, 9:16 for Shorts, Reels and TikTok. AI features can now handle captions, silence removal and reframing, but the decisions about what stays in are still yours.
- What an editor actually does, and the words you will meet
- Which software to start with, by device and goal
- A seven-step workflow you can reuse for every video
- How to trim, add text and apply a look in the free mini video editor
- Cuts, transitions, captions, audio, colour and effects
- Export settings for YouTube and for vertical short-form video
- What AI editing tools do well and where they need checking
What video editing is
Editing is the stage between recording and publishing. Raw footage contains false starts, pauses, shaky moments and things said twice. Editing removes what the viewer does not need and arranges what remains so that it makes sense and keeps moving.
A few terms appear in every editor, whatever it is called:
A piece of footage
One recording, or a portion of one, that you place in your video.
The working area
A horizontal strip where clips sit in order from left to right. Time runs along it.
Where you are
The vertical line showing the current moment. Cuts happen at the playhead.
A layer
Video tracks stack pictures and text; audio tracks hold voice, music and sound effects.
Two more ideas are worth knowing early. Non-destructive editing means your original files are never changed: the editor only stores instructions such as "use seconds 4 to 9 of this clip". You can always undo. And rendering or exporting is the final step in which the editor follows those instructions and writes a new, finished video file.
Choosing your first video editing software
The best first editor is the one you will open tomorrow. All of these can produce good results; they differ in how much they ask you to learn.
| Software | Runs on | Cost model | Good for | Keep in mind |
|---|---|---|---|---|
| CapCut | Phone, desktop, web | Free tier with paid upgrade | Short-form social video, fast results | Some features and templates are paid; availability varies by country |
| iMovie | Mac, iPhone, iPad | Free on Apple devices | First projects, family and school videos | Limited tracks and controls |
| Clipchamp | Windows, web | Free tier with paid upgrade | Simple edits on a Windows PC | Browser-based; needs a reasonable connection |
| DaVinci Resolve | Windows, Mac, Linux | Free version; paid Studio edition | Learning professional editing and colour | Steeper learning curve; wants a capable computer |
| Shotcut / Kdenlive | Windows, Mac, Linux | Free and open source | No-cost editing without accounts | Interfaces are less polished |
| Adobe Premiere Pro | Windows, Mac | Subscription | Professional and team work | Ongoing cost |
| Final Cut Pro | Mac, iPad | Paid | Fast editing on Apple hardware | Apple only |
Plans, prices and free-tier limits change frequently, so check each product's own site before deciding.
How to choose
- Editing on a phone for social media? Start with CapCut or the editor built into the platform you post on.
- On a Mac and brand new? Open iMovie. It is already installed.
- On Windows and want simple? Try Clipchamp.
- Want skills that carry into paid work? Learn DaVinci Resolve. The free version is enough for years.
Stay with one editor for your first ten videos. Switching tools resets your progress, and the concepts transfer anyway. Cutting is cutting in every program.
The beginner workflow in seven steps
Professionals follow the same order as beginners. Working in this sequence stops you polishing clips you later delete.
- Organise and import. Put all footage, audio and images for the project in one folder, then import it into the editor. Rename files so you can tell them apart.
- Make a rough cut. Drop clips on the timeline in order and remove the obviously unusable parts. Do not fine-tune yet.
- Tighten. Trim the start and end of each clip. Cut pauses, repeated lines and anything that does not serve the point.
- Fix the audio. Make speech clear and consistent in volume. Add music underneath, quietly.
- Add text and captions. A title, names or labels where needed, and captions for anything spoken.
- Adjust colour and add effects sparingly.
- Export in the right shape and format for where the video is going, then watch the finished file from start to end before uploading.
The next section lets you try steps 3, 5 and 6 immediately.
Try it: free mini video editor
Choose a short video from your phone or computer and experiment. Drag the Start and End sliders to trim, type a title, move it around, change its size, try an effect, switch on a progress bar. The preview updates instantly. When you like the result, press Export edited video to record the trimmed section with your text and look applied.
Your video never leaves your device: it is opened and processed inside this browser tab, and nothing is uploaded. This is a small demo for practising the basics, not a replacement for full editing software.
0:00.0 / 0:00.0
Choose a video to begin.
Trimmed length: 0.0 s
What this demo can and cannot do
It really does
- Open a video from your device without uploading it
- Play, pause, seek, change volume and preview speed
- Trim with start and end points
- Add a title with position, size and colour
- Apply effects, brightness and contrast
- Save a single frame as a PNG image
- Export the trimmed, styled clip as a new video file
Its limits
- One clip only; no joining clips or transitions
- Export records in real time: a 30-second trim takes 30 seconds, and the tab must stay open and visible
- Output is usually WebM, or MP4 in browsers that support recording it; quality is lower than a desktop editor
- Export needs a current desktop browser; some phone browsers can preview but not export
- In browsers without canvas filter support, such as some versions of Safari, effects show in the preview but are left out of the export
Those limits come from what a web page can do without sending your file to a server. Full editors install software, or process video on their own servers, to get around them. For learning how trimming, titles and looks affect a clip, this is enough.
Cuts, trimming and transitions
Trim and split
Trimming shortens a clip from its start or end, which is what the sliders in the demo do. Splitting cuts one clip into two at the playhead so that you can remove a section from the middle. Between them, these two actions are most of editing.
Guidelines that improve almost any first edit:
- Start late, end early. Begin each clip at the moment something happens and leave just after it finishes.
- Cut the breaths and the "um"s in talking videos, but leave an occasional natural pause so speech does not sound robotic.
- Cut on action. If someone reaches for a cup, cut during the movement, not before or after it. The eye follows the motion and does not notice the join.
- Front-load the point. Viewers decide in the first few seconds. Put the most interesting moment or the clear promise first.
Useful kinds of cut
| Cut | What it is | Use it when |
|---|---|---|
| Hard cut | One clip ends, the next begins | Almost always. It is the default. |
| Jump cut | Removing part of one continuous shot, so the subject "jumps" | Talking-to-camera videos, to remove pauses |
| J-cut | The next clip's sound starts before its picture | Leading the viewer smoothly into a new scene |
| L-cut | The current clip's sound continues over the next picture | Showing what a speaker is describing |
| Cutaway (B-roll) | Covering the main shot with supporting footage | Hiding jump cuts and illustrating a point |
Transitions
A transition is an effect between two clips: a fade, a dissolve, a slide, a zoom. Editors include hundreds, and beginners use too many. A plain cut is invisible and keeps pace. Reserve a short cross-dissolve for a passage of time, and a fade to or from black for the start and end. If a transition draws attention to itself, it is usually the wrong choice.
Text, captions, audio and music
Titles and on-screen text
- Keep it short. A title is read in a glance: aim for seven words or fewer.
- Leave it up long enough to read twice at normal speed.
- Use one or two fonts for the whole video, in a bold, plain style.
- Ensure contrast. White text with a dark outline or background box stays legible over any footage. You can see the difference in the demo by toggling the dark background.
- Stay inside the safe area. Keep text away from the edges, and on vertical video away from the top and bottom, where apps place their own buttons and captions.
Captions
Captions are the written version of what is said. They matter for three reasons: many people watch with the sound off, they make video usable for deaf and hard-of-hearing viewers, and they help people follow speech in a second language. Most editors and platforms can now generate captions automatically. Always read them through. Automatic captions regularly get names, technical terms and numbers wrong.
Audio
Viewers forgive imperfect pictures far more readily than poor sound. If you improve only one thing, improve this.
- Record close. A cheap microphone near the mouth beats an expensive one across the room.
- Keep speech level consistent from clip to clip, loud enough to hear clearly and never hitting the red end of the meter, which causes distortion.
- Put music well underneath speech. If you strain to hear the words, the music is too loud. Many editors can lower music automatically when someone talks, a feature called ducking.
- Use short fades at the start and end of audio clips to avoid clicks.
- Listen on phone speakers and headphones before exporting. Most of your audience will use one of the two.
You cannot use any song you like. Using copyrighted music without permission can lead to your video being muted, blocked, demonetised or removed. Use music from the platform's own library, a licensed stock music service, or tracks whose licence clearly allows your use, and keep a record of where each track came from.

Colour correction and effects
Two different jobs share the word colour. Colour correction fixes problems so footage looks natural. Colour grading adds a deliberate style. Beginners should correct first and grade lightly, if at all.
A simple correction order
- Exposure: make the image neither too dark nor too bright.
- Contrast: separate darks from lights so the image is not flat.
- White balance: remove an orange or blue cast so whites look white.
- Saturation: a small increase, if colours look dull.
- Match: check that neighbouring clips look as though they belong together.
Try the Brightness and Contrast sliders in the demo above on your own clip. Small moves are enough. If a change is obvious at first glance, halve it.
Filters, LUTs and effects
A filter or LUT (look-up table) applies a ready-made look in one click, like the effect menu in the demo. They are quick, and easy to overdo. Apply one after correcting the footage, and reduce its strength.
The same restraint applies to effects such as zooms, shakes, glitches and speed ramps. One well-placed effect emphasises a moment. Ten in a row tell the viewer you have just discovered the effects panel.
Export settings: YouTube, TikTok, Reels and Shorts
Exporting turns your project into a single file. Four settings matter most: aspect ratio (the shape), resolution (the number of pixels), frame rate (frames per second) and format.
| Destination | Shape | Common resolution | Notes |
|---|---|---|---|
| YouTube (standard video) | 16:9 horizontal | 1920 × 1080 (1080p); 3840 × 2160 for 4K | Longer videos; chapters and a custom thumbnail help |
| YouTube Shorts | 9:16 vertical | 1080 × 1920 | Short-form; check the current maximum length |
| TikTok | 9:16 vertical | 1080 × 1920 | Keep key content clear of the interface at the edges |
| Instagram Reels | 9:16 vertical | 1080 × 1920 | Feed previews may crop; keep the subject central |
| Square or feed posts | 1:1 or 4:5 | 1080 × 1080 or 1080 × 1350 | Useful for feeds where vertical is cropped |
Platforms change their length limits and recommendations regularly, so confirm the current figures in each platform's help pages before a big upload.
Safe defaults for everything else
- Format: MP4 with the H.264 codec and AAC audio. It plays everywhere and every platform accepts it.
- Frame rate: the same as your footage, usually 24, 25, 30 or 60 frames per second. Do not convert without a reason.
- Bitrate: use your editor's preset for the platform. As a reference point, YouTube's published recommendation for standard 1080p uploads is about 8 Mbps at 24 to 30 frames per second and 12 Mbps at 48 to 60.
- Audio: stereo, 48 kHz.
Horizontal and vertical from one shoot
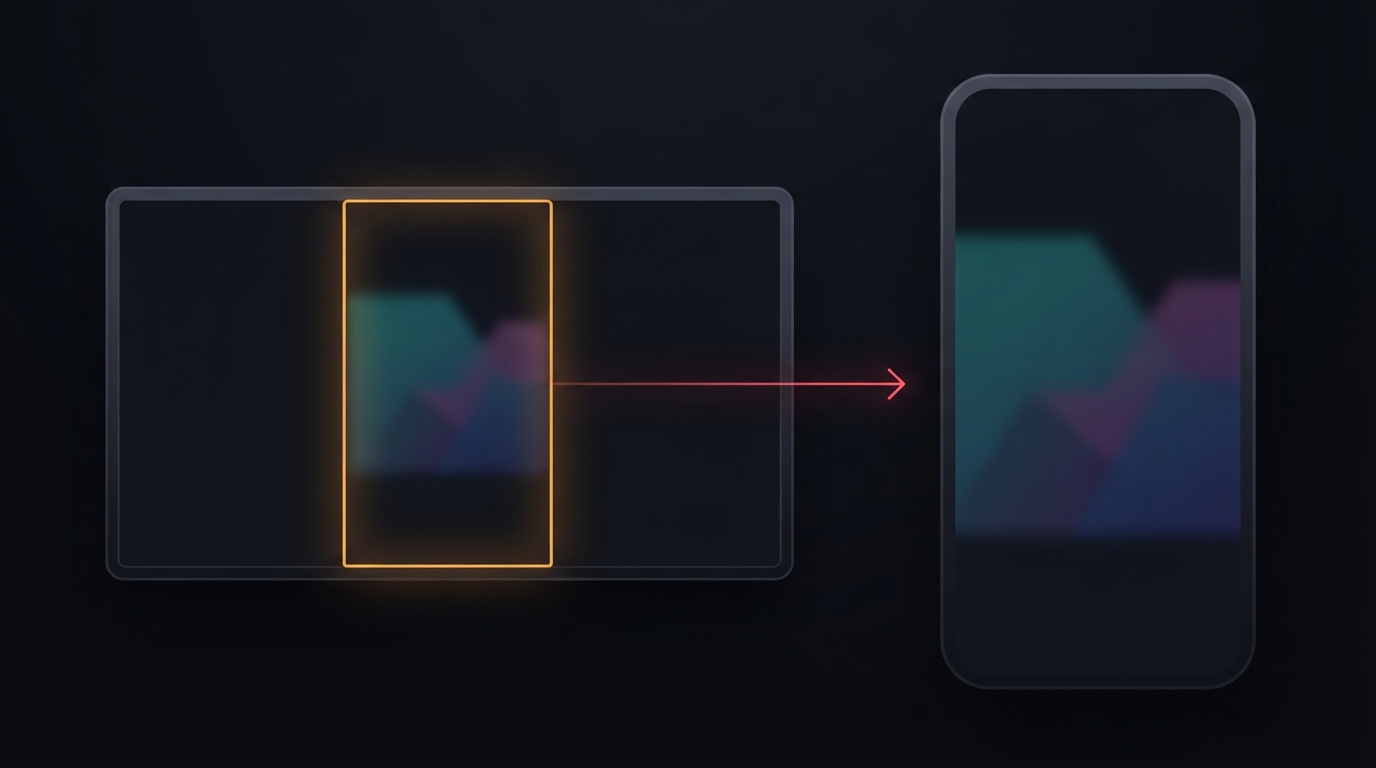
If you want both a YouTube video and short vertical clips, film horizontally in the highest resolution you can and keep the subject near the centre of the frame. You can then crop a vertical version from the middle without losing the action. Turning one finished video into several short ones is one of the most efficient things a creator can do; our content repurposing guide covers the planning side.
AI video editing in 2026
AI features are now built into most editors, including several in the table above. They are most useful for the repetitive parts of the job.
| AI feature | What it does | What to check |
|---|---|---|
| Automatic captions | Transcribes speech into timed captions | Names, numbers, technical words and punctuation |
| Silence and filler removal | Finds and cuts pauses and "um"s | That it has not clipped the start or end of words |
| Text-based editing | Lets you cut video by deleting words in a transcript | The picture at each cut, for awkward jumps |
| Auto reframe | Crops horizontal video to vertical and follows the subject | Moments where it follows the wrong person or object |
| Noise reduction and voice clean-up | Removes hiss, hum and room echo | That voices do not sound thin or artificial |
| Highlight detection | Suggests short clips from a long recording | That the clip makes sense without the surrounding context |
| Generative video and images | Creates footage, backgrounds or B-roll from a text description | Accuracy, visual glitches, usage rights and platform disclosure rules |
Treat these as an assistant doing the first pass. They save real time on captions and tidying, and they do not know what your video is for. Choosing which moments matter, in what order, at what pace, is still editing.
First, several platforms require creators to label realistic content that was made or significantly altered with AI; check the current rules where you publish. Second, do not use AI tools to imitate a real person's face or voice without their permission. If you use AI to write scripts or facts for a video, verify them first: see how to fact-check AI content.
Common mistakes and how to improve
Common beginner mistakes
- Slow openings. Long logo animations and "hey guys, so today..." lose viewers before the content starts.
- Keeping too much. If a moment does not inform, entertain or move the story on, cut it. Nobody misses what they never saw.
- Too many transitions and effects.
- Music louder than speech.
- Unreadable text: too small, too brief, or lost against a busy background.
- Wrong shape for the platform. A horizontal video with black bars on a vertical feed looks like an afterthought.
- Not watching the export. Glitches, missing audio and typos often appear only in the final file.
- Unlicensed music.
- Disorganised files. Moving or renaming footage after importing breaks the project's links to it.
- No backups. Keep a copy of original footage until the project is published.
How to improve your editing
- Finish small projects. Ten completed 30-second videos teach more than one abandoned ten-minute one.
- Re-create an edit you admire. Take a short video you like and note every cut, text and sound. Then copy its structure with your own footage.
- Learn five keyboard shortcuts: play and pause, split, delete, undo and zoom the timeline. They double your speed.
- Watch your edit with the sound off, then with your eyes closed. Each pass exposes different problems.
- Ask one person to watch and note where they look away.
- Schedule the practice. A fixed slot each week beats waiting for free time. Our time blocking planner can help you protect it.
First-video checklist
FAQ
iMovie on Apple devices, Clipchamp on Windows and CapCut on phones are the easiest places to start. All three have free options and cover trimming, text, music and export.
Yes. Capable free editors exist for every device, including the free version of DaVinci Resolve, and the makers publish their own tutorials. The cost is your practice time.
You can make a clean, simple edit within a few days of practice. Becoming fast and developing a sense of pacing takes months of finishing projects. Progress comes from completed videos, not hours of tutorials.
Not to begin. Phones and ordinary laptops handle 1080p editing in lightweight apps. Professional software, 4K footage and heavy effects benefit from more memory, a faster processor and a dedicated graphics card.
MP4 using the H.264 codec with AAC audio is accepted everywhere. Use 16:9 at 1080p or higher for standard YouTube videos and 9:16 at 1080 × 1920 for Shorts, Reels and TikTok.
AI can handle specific tasks well: captions, removing silences, reframing for vertical and cleaning up audio. It does not know your purpose or your audience, so you still choose what stays, in what order, and you should check its output.
The video is opened by your own browser and processed on your device. It is not uploaded to ThemeZone or anyone else, and it disappears from the page when you close or reload the tab.
Browsers record video in the formats they support, and for most that is WebM. It plays in modern browsers and many players. If you need MP4, open the file in a desktop editor or a converter and export it again.
Final recommendation
Video editing is a small set of skills practised often: cut what is not needed, order what is left, make the sound clear, add readable words and export in the right shape. Pick one free editor today and finish a 30-second video this week using the seven-step workflow. Use the mini editor above to get a feel for trimming and titles first, then repeat the same moves in your chosen software.
Your first edits will be rough. Publish them anyway, and make the next one slightly tighter.
Official references
- YouTube Help: recommended upload encoding settings
- YouTube Help: what is fair use and copyright on YouTube
- Blackmagic Design: DaVinci Resolve training
- MDN: MediaStream Recording API (the browser feature behind the demo's export)
- W3C Web Accessibility Initiative: captions and subtitles
Next step
Scroll back to the mini video editor, trim your best five seconds and export it. Then plan how one video can become a week of posts with our content repurposing guide.