Home › WordPress Guides › Google Docs to WordPress
WordPress Guides · Free tool
How to Paste from Google Docs to WordPress Without Messy Formatting
Writing in Google Docs is comfortable. Moving that draft into WordPress is where things go wrong: images stay on Google's servers, your title becomes a second H1, and some editors save every font size and color you never asked for. Here is a clean workflow, an honest look at what WordPress already fixes for you, and a free converter that cleans your draft and tells you what still needs attention.
<b style="font-weight:normal;" id="docs-internal-guid-…">
<p dir="ltr" style="line-height:1.38;margin-top:0pt;margin-bottom:0pt;">
<span style="font-size:11pt;font-family:Arial,sans-serif;color:#000000;background-color:transparent;font-weight:700;font-style:normal;font-variant:normal;text-decoration:none;vertical-align:baseline;white-space:pre-wrap;">own</span><p>A newsletter is the one
audience you <strong>own</strong>.</p>Why pasting from Google Docs goes wrong
When you copy text in Google Docs, the clipboard holds two versions: plain text and HTML. The HTML version describes every visual detail of your document with inline styles — font size in points, font family, text color, line height, margins, even white-space:pre-wrap on every run of text. A single bold word can arrive wrapped in a few hundred characters of styling, as the example above shows.
The good news: the WordPress block editor already handles a lot of this. Its paste handler — you can read it in the Gutenberg source code — removes the hidden wrapper Google Docs puts around copied content, strips formatting whitespace, deletes empty paragraphs, converts Word-style lists, and turns pasted Markdown into blocks. If you paste a simple text-only draft into the block editor, it usually arrives fine.
The problems that remain are the ones people notice after publishing:
Images stay on Google
The editor uploads images that arrive as embedded data, but images that arrive as web addresses — the usual case from Google Docs — keep pointing at Google's servers instead of your Media Library.
A second H1
Your theme already prints the post title as the page's main heading. Paste a document whose title is styled as Heading 1 and you get two.
Other editors keep the mess
The Classic editor's visual tab, many page-builder text widgets and a Custom HTML block do not clean anything. Fonts, colors and empty spans are saved into the post.
Redirect links
Links copied from a published Google Doc can be wrapped in https://www.google.com/url?q=… redirects, which send your readers through Google first.
None of this is hard to fix once you know it happens. The rest of this guide shows how — and the converter below does the boring parts automatically.
Free Clean Paste Converter
Copy your text in Google Docs (or Word), click the box below and paste. The converter removes inline styles, Google's wrapper and empty paragraphs, turns styled spans back into proper bold and italic tags, fixes nested lists, unwraps Google redirect links and lists every image that still lives on someone else's server. It runs entirely in your browser — nothing is uploaded, and it is a rule-based cleaner, not an AI.
Clean Paste Converter
Google Docs · Word · any web page → clean HTML for WordPress
Runs in your browser
Loading the converter… If this message stays, your site is blocking inline scripts — see the setup notes for this article.
"Copy for WordPress editor" puts formatted content on your clipboard — paste it into an empty paragraph in the block editor or the Visual tab of the Classic editor. "Copy HTML code" is for the Code editor, the Classic editor's Text tab or a Custom HTML block. Images marked in yellow in the preview still live on another server.
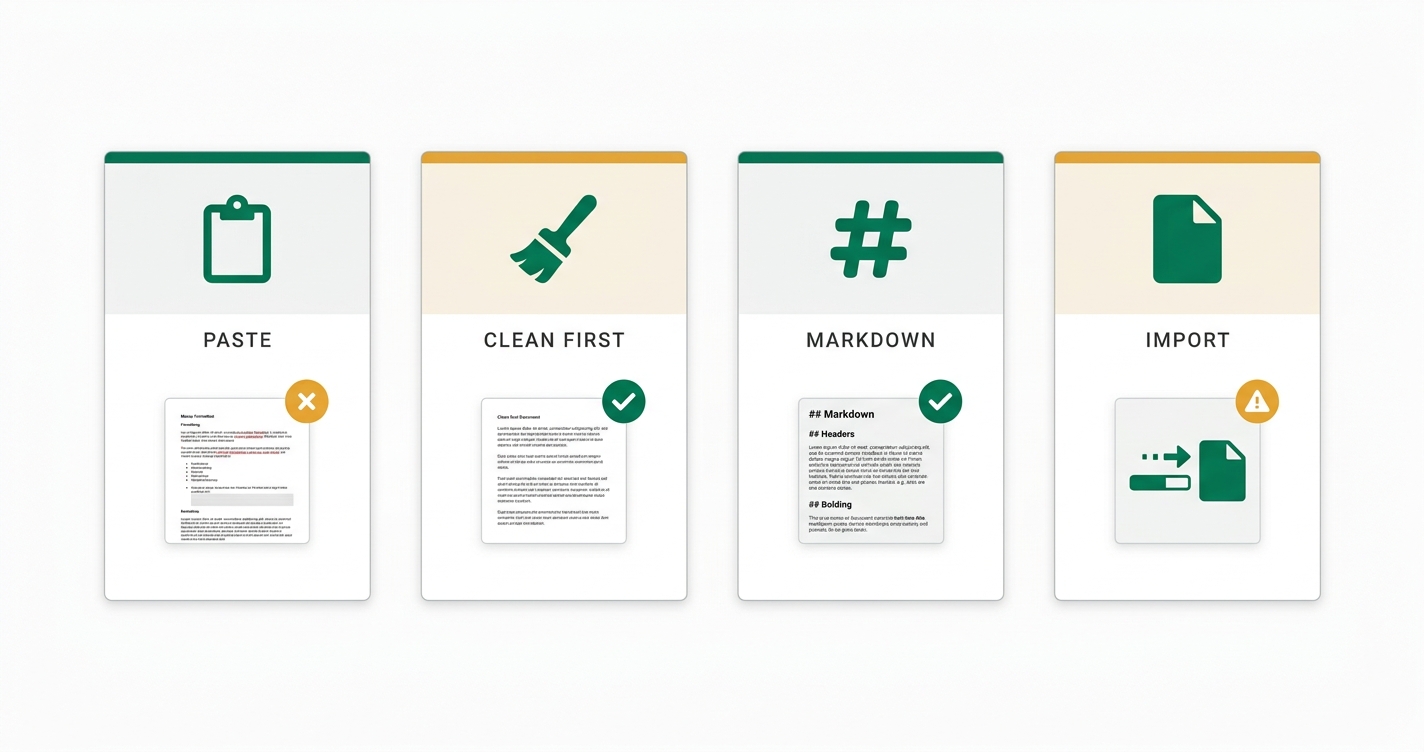
Four ways to get from Google Docs to WordPress
There is no single right method. The best choice depends on how many images your posts have and which editor you use.
| Method | Best for | Images | Cost | Watch out for |
|---|---|---|---|---|
| Paste straight into the block editor | Short, text-only posts | Stay on Google's servers; upload them one by one afterwards | Free | Duplicate H1, redirect links, images that break later |
| Clean first with a converter (like the one above) | Classic editor, page builders, or when you want a checklist of problems | Listed and flagged so you can replace them | Free | You still upload images yourself |
| Copy as Markdown from Google Docs | Writers comfortable with Markdown | Add them separately | Free | Must be switched on under Tools → Preferences → Enable Markdown |
| Download as .docx and import with the free Mammoth .docx converter plugin | Image-heavy posts | Uploaded to your Media Library automatically | Free plugin | One more plugin to keep updated |
Google added the Markdown options to Docs in July 2024: once you enable them, choose Copy as Markdown from the Edit menu or the right-click menu to copy your draft as plain Markdown, and the block editor turns pasted Markdown into headings, lists and paragraphs. The Mammoth plugin, listed on WordPress.org, converts .docx files from Word, Google Docs and LibreOffice into clean HTML and uploads embedded images to the Media Library.
The clean workflow, step by step
This workflow takes two or three minutes per post once it becomes a habit, and it avoids every problem in section one.
- Use real heading styles in Docs. Format → Paragraph styles → Heading 2 for main sections and Heading 3 inside them. Big bold text is not a heading to WordPress or to Google.
- Keep the post title out of the body. You will type the title into WordPress's title field. If it is in the document, either skip it when you copy or let the converter turn the H1 into an H2 and delete it.
- Copy the body. Click at the start of your first paragraph, hold Shift and click at the end, then Ctrl + C (⌘ + C on a Mac).
- Clean it. Paste into the converter above and read the Report tab. It tells you about redirect links, external images and heading jumps.
- Paste into WordPress. Click "Copy for WordPress editor", open your post, click into an empty paragraph and paste. The block editor turns the clean HTML into paragraph, heading, list, table and image blocks.
- Replace the images. Upload each image to your Media Library (section five shows two quick ways) and add alt text.
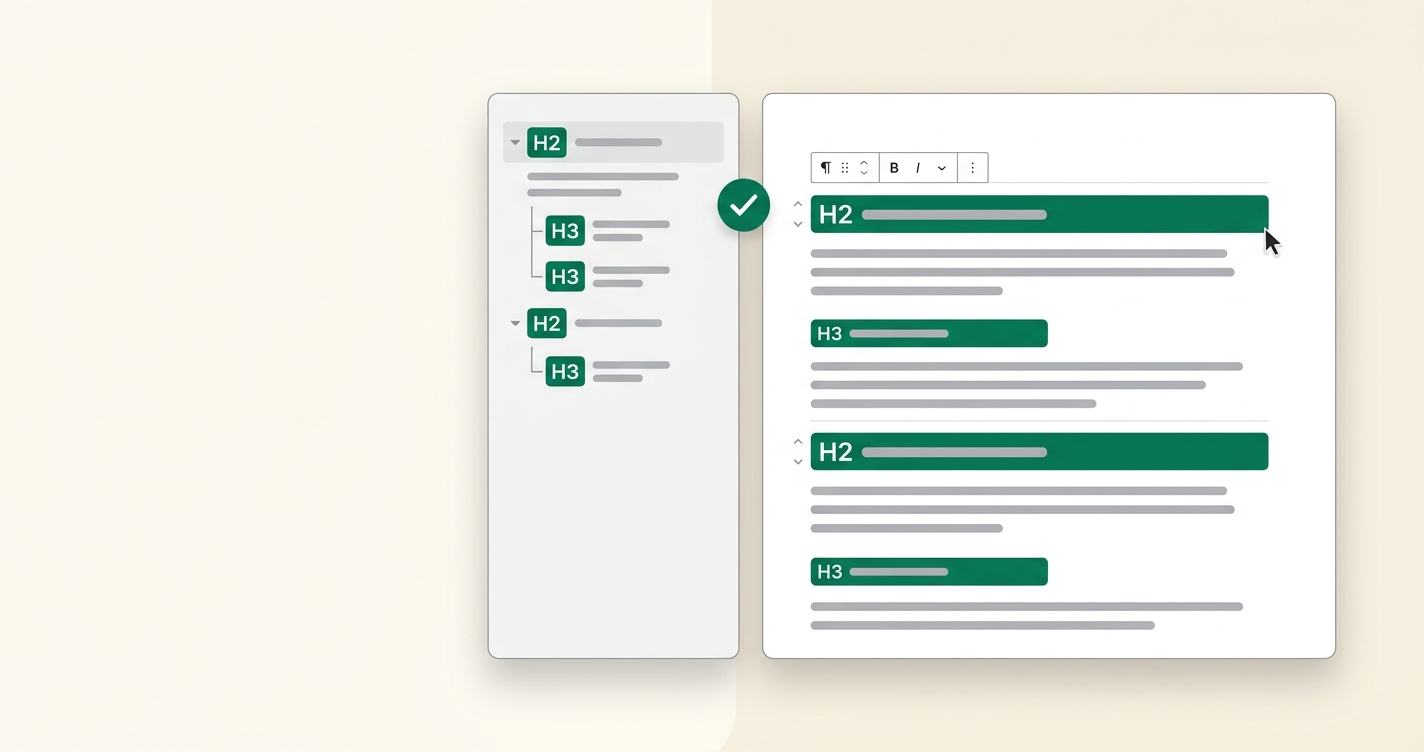
- Check the outline. Open Document Overview in the editor toolbar and look at the Outline: headings should go H2, H3, H2 — never jump from H2 to H4.
- Preview on your phone, then publish.
Ctrl + Shift + V (⌘ + Shift + V) pastes without any formatting in most browsers. You lose headings, bold and links too, so it is only useful for a paragraph or two.
If you draft with help from AI tools, the same workflow applies — see our guide to writing blog posts with AI for the editing side, and our content brief template for planning a draft before you write it.
Fix your images — the part most people get wrong
When you copy an image from Google Docs, the clipboard usually carries a link to a copy on Google's servers (an address on googleusercontent.com) rather than the image file itself. WordPress displays it, so everything looks fine in the editor. But the file is not in your Media Library: you cannot resize or compress it, it does not get the responsive image sizes WordPress creates for uploads, and if Google ever changes or removes that copy, the image breaks on your live post.
Two quick ways to bring images home
- From inside the editor: select each image block and look for the Upload to Media Library button in the block toolbar. It fetches the remote file and adds it to your library. Some hosts block this kind of fetch; if the button does not appear or fails, use the next method.
- From Google Docs: choose File → Download → Web page (.html, zipped). The ZIP contains an
imagesfolder with every picture in your document. Upload those to WordPress and swap them in.
While you are there
- Alt text: check every image's alt text in WordPress — do not assume it came across from Docs. Describe what the image shows and why it is there.
- File size: screenshots from Docs are often PNGs of several hundred kilobytes. Compress them before uploading.
- Dimensions: our website image size guide lists sensible widths for in-post images.
Headings, links and tables
Headings
Your theme prints the post title as the page's H1. Every heading in the body should therefore start at H2. Google's documentation does not penalise multiple H1s, but a second H1 that repeats the title adds nothing and confuses screen-reader users who navigate by headings. Keep the order logical — H2 for sections, H3 inside them — and never skip a level just because a smaller heading "looks better"; change the style instead.
Links
After pasting, hover over a few links. If any start with https://www.google.com/url?q=, they are redirects copied from a published Doc; the converter unwraps them back to the real address. Also check that internal links point to your live URLs, not to draft or preview links, and add a few where they help readers — our internal linking guide explains where they belong.
Tables
Google Docs tables carry fixed column widths and border styles. The block editor converts a clean table into a Table block, where you can switch on a header row and let the theme style it. In the Classic editor, remove width attributes or the table may overflow on phones.
Before you hit Publish: a quick checklist
- Only one H1 on the page — the post title. Body headings start at H2.
- Every image is in your Media Library, compressed, with alt text.
- No links starting with
google.com/url?q=, and no links to drafts. - No empty paragraphs used as spacers.
- A short, readable slug — see SEO-friendly URLs.
- A title tag and meta description that fit — see title tag and meta description length.
- Short paragraphs that read well on a phone — our readability guide helps.
- A featured image set in the post settings.
Common mistakes
| Mistake | Result | Fix |
|---|---|---|
| Leaving images on Google's servers | Images can break later; no compression or responsive sizes | Upload every image to the Media Library |
| Pasting the document title as Heading 1 | Two H1 headings on the page | Delete it or convert it to H2 |
| Faking headings with bold, larger text | No structure for readers, Google or screen readers | Use real Heading styles in Docs |
| Using blank lines for spacing | Empty paragraph blocks and uneven gaps | Let your theme handle spacing |
| Pasting into the Classic editor without cleaning | Fonts and colors saved into the post, overriding your theme | Clean first, or paste as plain text |
| Not checking links | Readers sent through Google redirects or to draft URLs | Hover and test every link before publishing |
Troubleshooting
Everything landed in one big block
That happens when you paste into a Classic block, or when the pasted content is treated as plain text. Paste into an empty paragraph block instead. If a Classic block already holds your post, use its "Convert to blocks" option in the block toolbar.
Fonts or colors from Docs show on the live site
You pasted into an editor that keeps inline styles. Paste the cleaned content again, or in the Classic editor use the Text tab and paste the converter's HTML code.
Bold or italic disappeared
Google Docs marks bold as styled text rather than a bold tag. The block editor and this converter both understand that, but some other editors and plain-text paste do not. Use the converter's rich copy, or reapply the formatting.
Images showed in the editor but broke after publishing
The image was still hosted elsewhere and that copy changed or expired. Upload the original file to your Media Library and replace it.
Nested bullet points came out flat
Google Docs stores nested lists in a way some tools misread. The converter repairs the common case; if a list still looks wrong, select the items in the block editor and use the indent button in the List block toolbar.
Frequently asked questions
Can I paste from Google Docs straight into WordPress?
Yes. The block editor cleans most of the formatting automatically, so text, headings, lists and links usually arrive fine. The things to check afterwards are images (which stay on Google's servers), a duplicate H1, and any Google redirect links.
Why do my Google Docs images not appear in the Media Library?
Google Docs usually copies images as links to Google-hosted copies, not as files. WordPress shows them but does not upload them. Use the Upload to Media Library button on each image block, or download the document as a zipped web page and upload the images yourself.
Does the converter send my content anywhere?
No. All cleaning happens in your browser with JavaScript. Nothing is uploaded or stored, and refreshing the page clears it.
Is it better to write directly in WordPress?
It avoids the paste step, but many writers prefer Google Docs for comments, suggestions and sharing with editors. A clean paste workflow gives you the best of both.
What about Microsoft Word documents?
The same principles apply. The block editor handles Word's list format, and the converter removes Word's hidden markup too. For image-heavy Word files, importing the .docx with a converter plugin saves time.
Does pasting from Google Docs hurt SEO?
Not by itself. The risks are indirect: broken images, a confusing heading structure and heavy inline code that slightly bloats your pages. A clean paste avoids all three.
Can I use the Markdown option instead?
Yes. Enable Markdown in Google Docs under Tools → Preferences, choose Copy as Markdown, and paste into the block editor, which converts Markdown into blocks. Add images separately.
Conclusion and next step
Google Docs and WordPress work well together once you stop expecting the paste to be perfect. Write with real heading styles, keep the title out of the body, clean the content, then bring every image into your Media Library. The block editor does more cleanup than it used to; the images and the duplicate H1 are still on you.
Next step: open your next draft, paste it into the converter above and read the Report tab before it goes anywhere near WordPress. If you are planning a regular publishing schedule, our content calendar guide helps you plan what to write next.
Related guides on ThemeZone
Sources
- WordPress Gutenberg source — raw-handling (paste handler, Google Docs wrapper remover, image corrector)
- Google Workspace Updates — Import and export Markdown in Google Docs (July 2024)
- WordPress.org Plugins — Mammoth .docx converter
- Glow Blogs help — Using images from elsewhere (Image block "Upload to Media Library")